Category Archives: Holiday Food

Brussel Sprout Magic


Dear Dad,

I wish you weren’t so turned off by brussels sprouts, they’re really pretty good.  In fact, they are better than pretty good, they’re really good.  All those years of turning your nose up at them at Thanksgiving when Cousin Karen would bring them seems silly now.   In fact, I like them sauteed with bacon or even served up with Greek yogurt at DC favorite Zaytinya. 

But, dad, they are also good simply roasted.  Here, let me show you.
Love, Carly

True story friends, up until a few years ago I had never tried a brussels sprout.  If you were like me, or my sister up until this past weekend, it is time for a change.  I love this as an easy, low maintenance side dish that requires no effort after prep time.  We served it with out Hanukkah party, but its a mainstay throughout winter when they are in season.

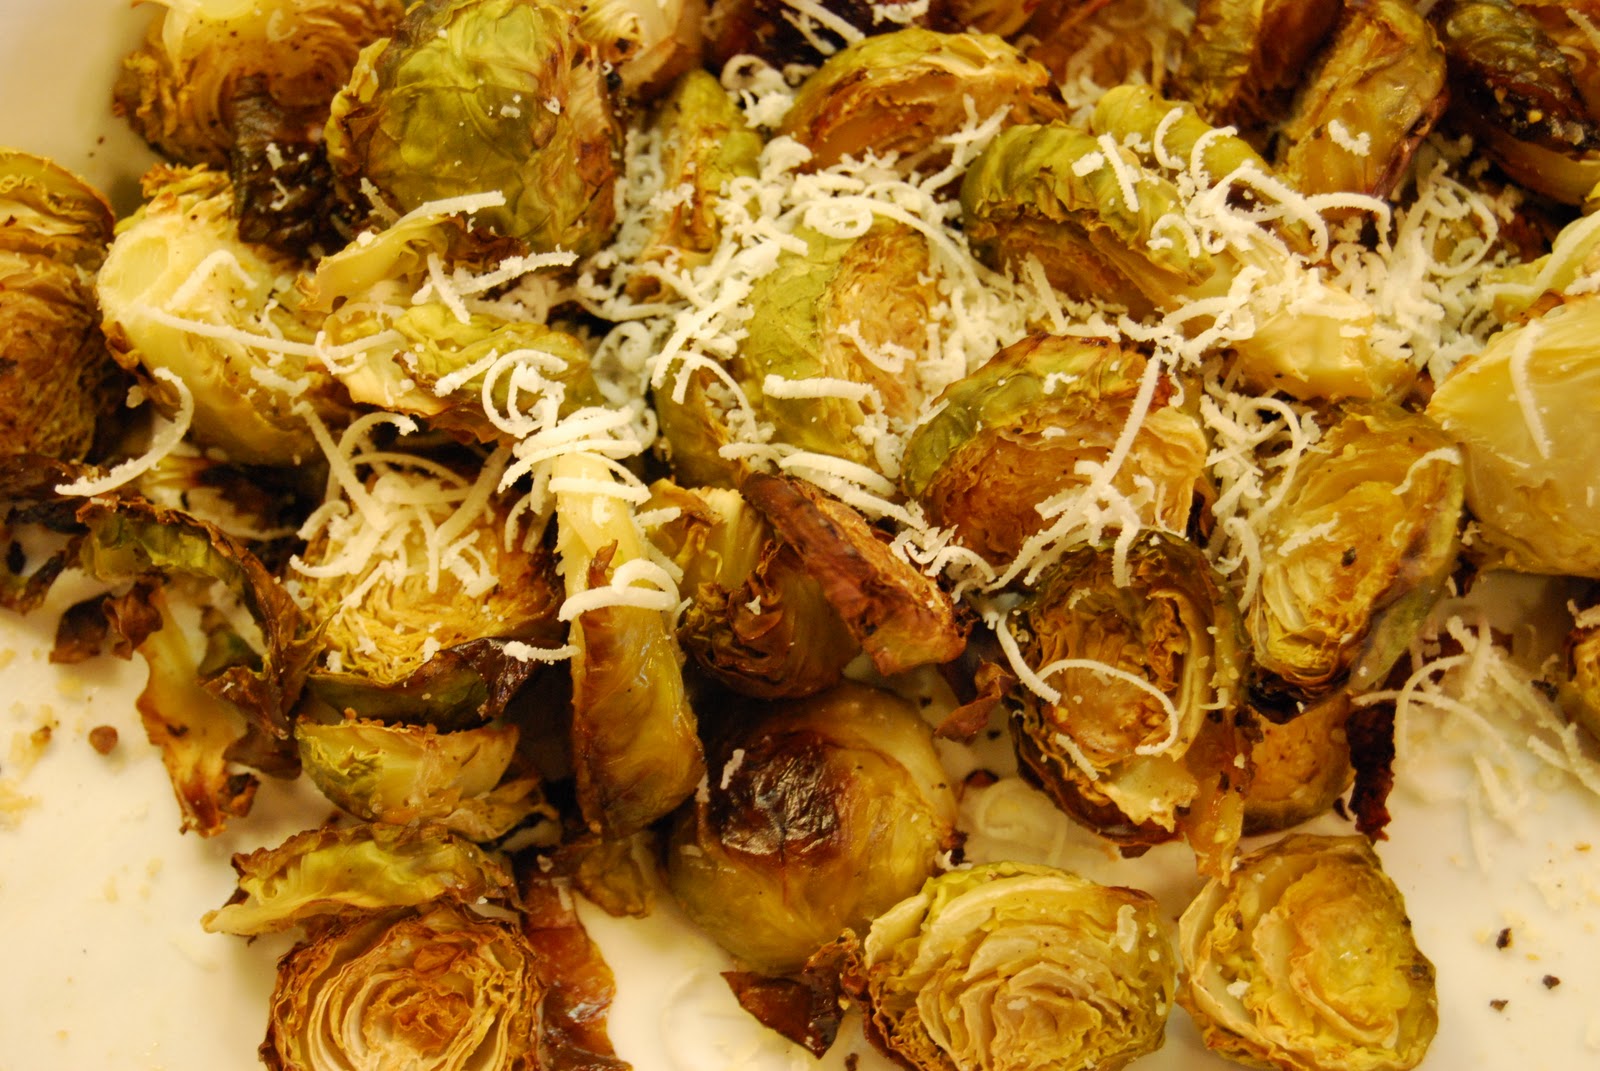
Roasted (Parmigiana – or not) Brussels Sprouts
A bag of brussels sprouts (the quantity depends on how many you’re feeding
A drizzle of olive oil
A sprinkle of salt and pepper
A shaving of parmigiana, optional
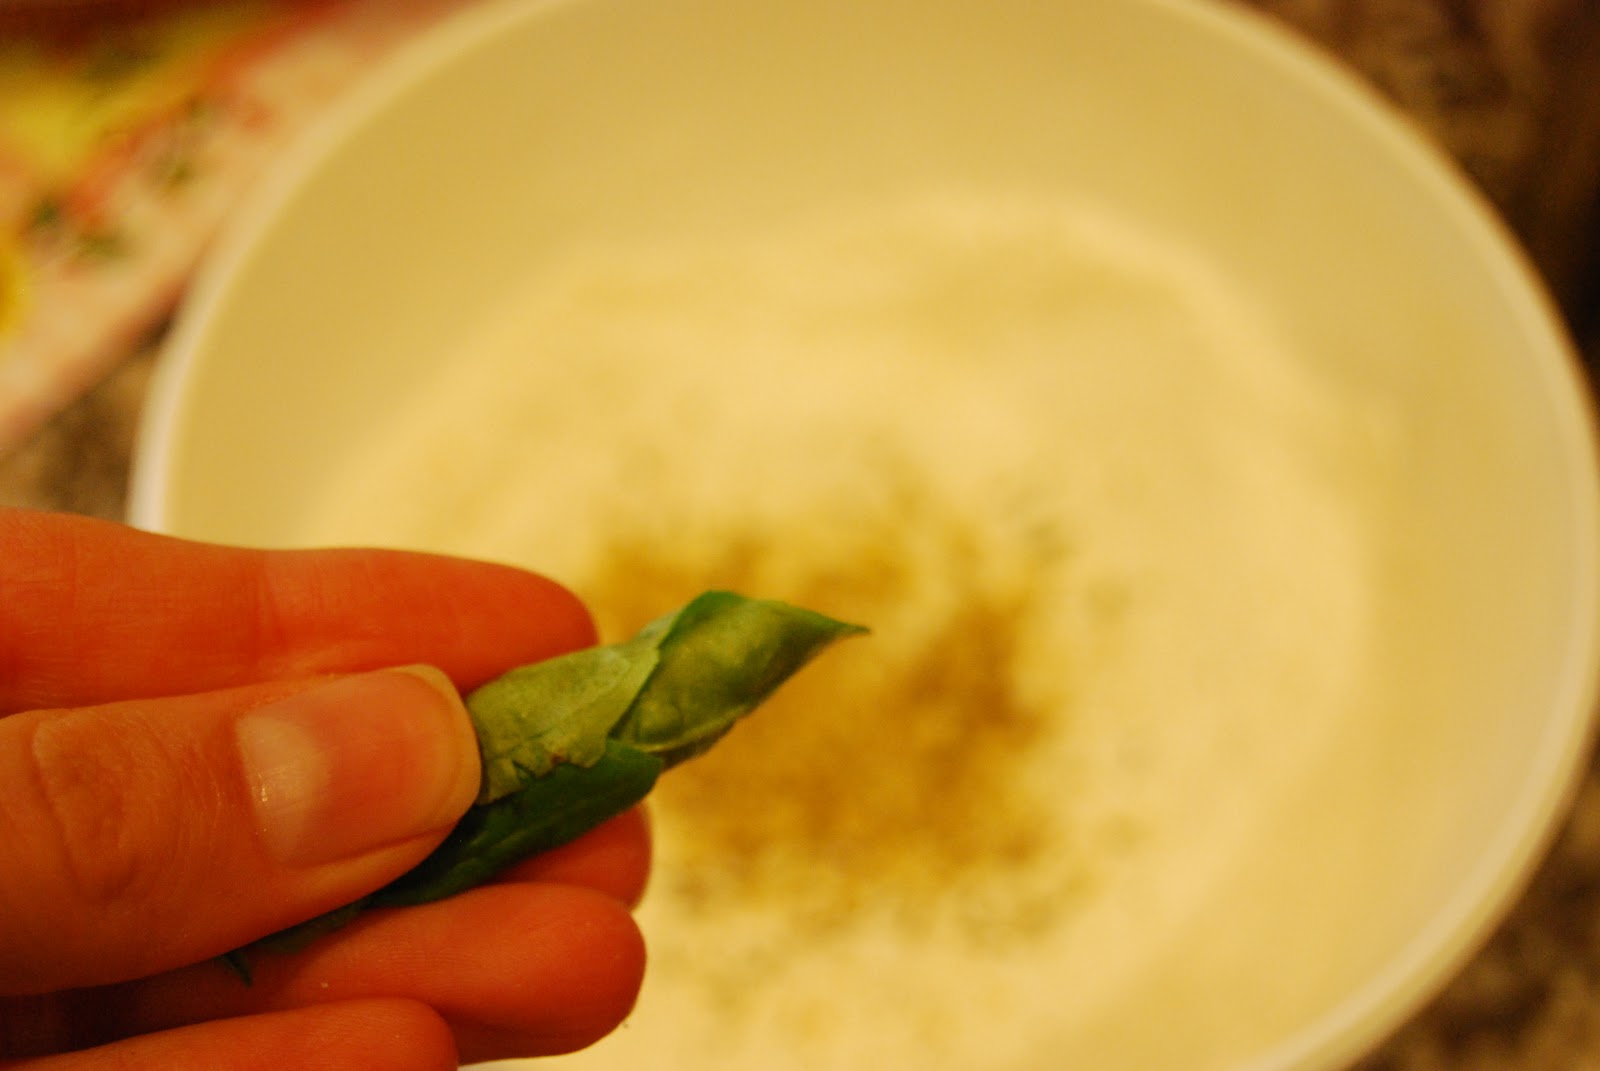
 First things first, rinse off all of those little mini lettuce heads.  TO be fair, they just look like heads of lettuce, the flavor is far more rich and intense.  Now its time to prune the sprout, or head, or whatever, it’s time to peel leaves off of the green ball in your hand…

You might notice that there are some weird/yucky/unappetizing black blemishes or dots on the outside leaves.  Fear not!  You are just going to rub back the leaf and then rip it off.  Each sprout will shrink in size a bit, but it’s okay.  It will be pretty again soon.
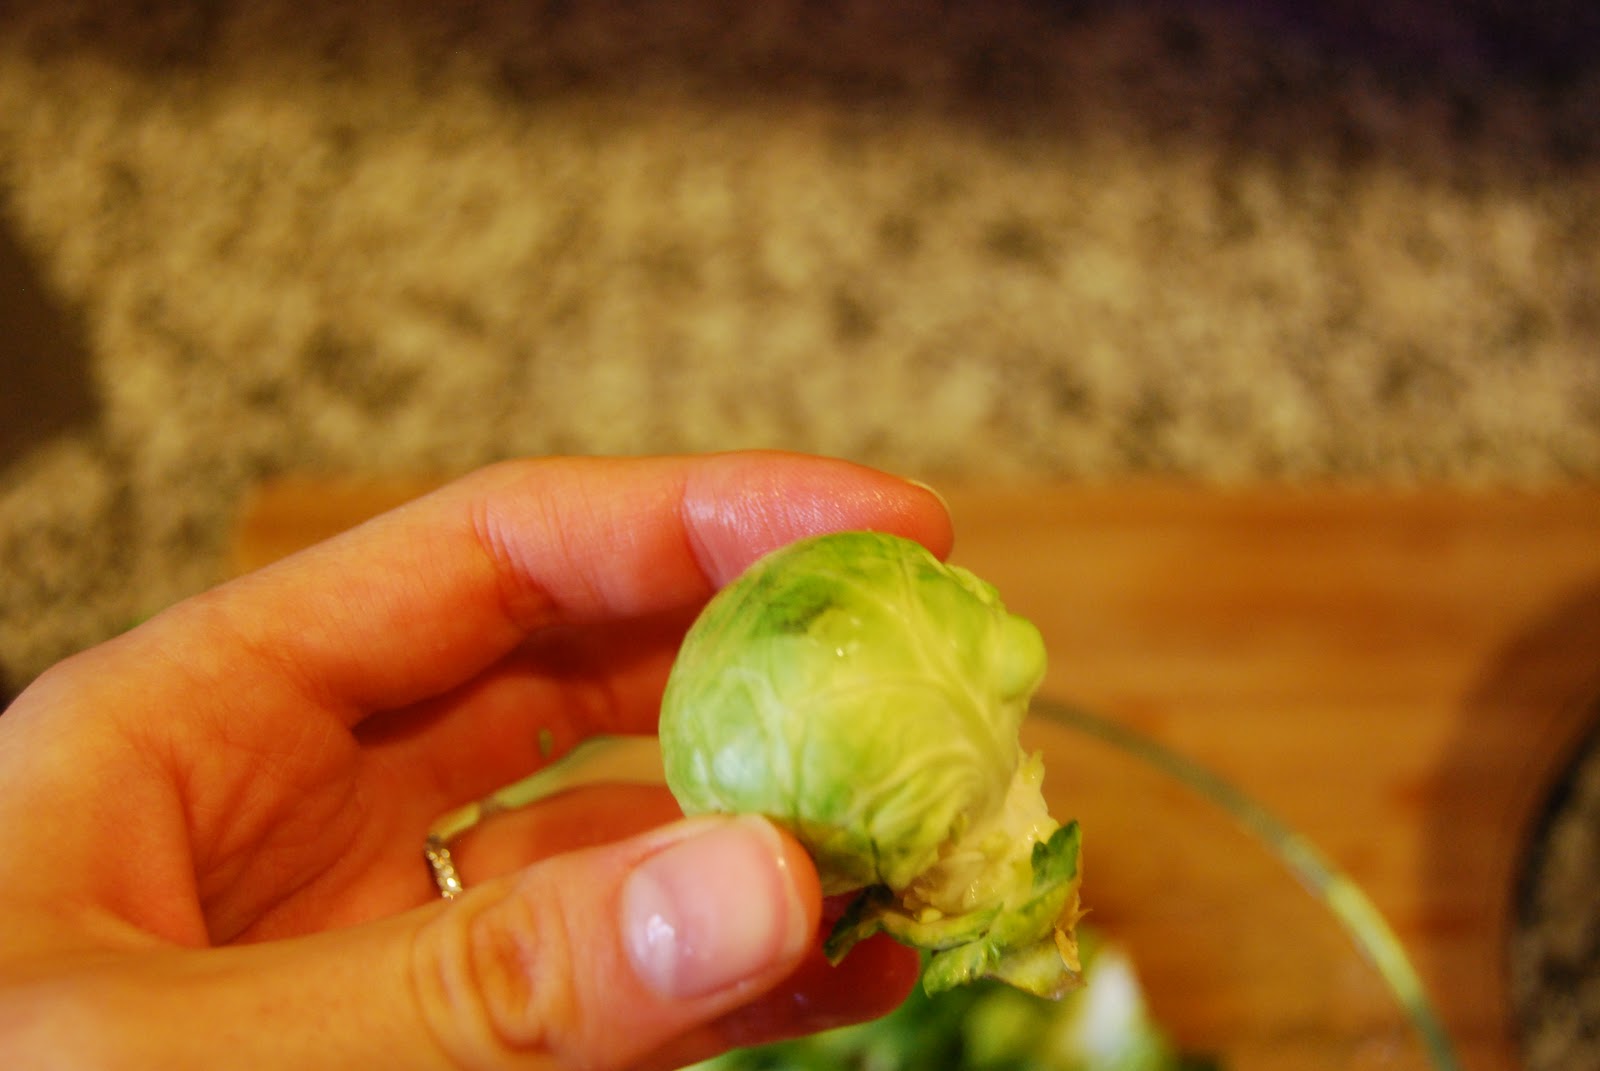
Ta Da!

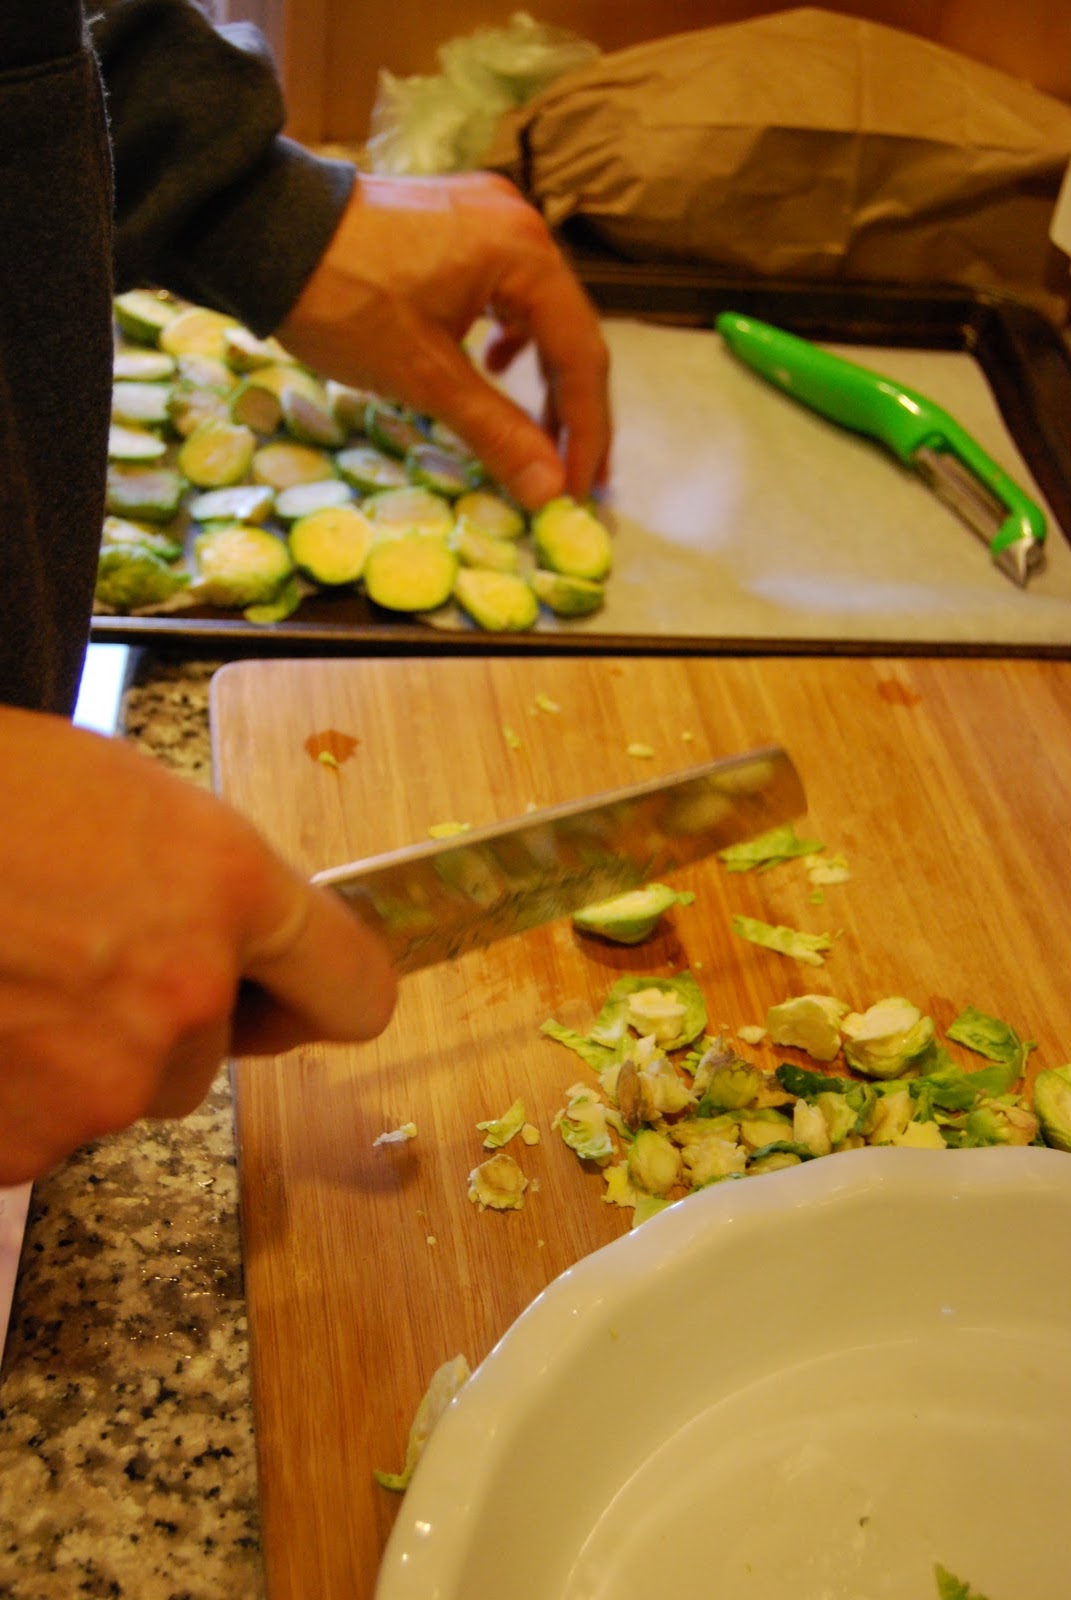
Then you’re going to cut the brussels sprouts into thirds.  Insider secret, if after peeling off ugly leaves there is a bit of a white “stem” you can cut that off too.


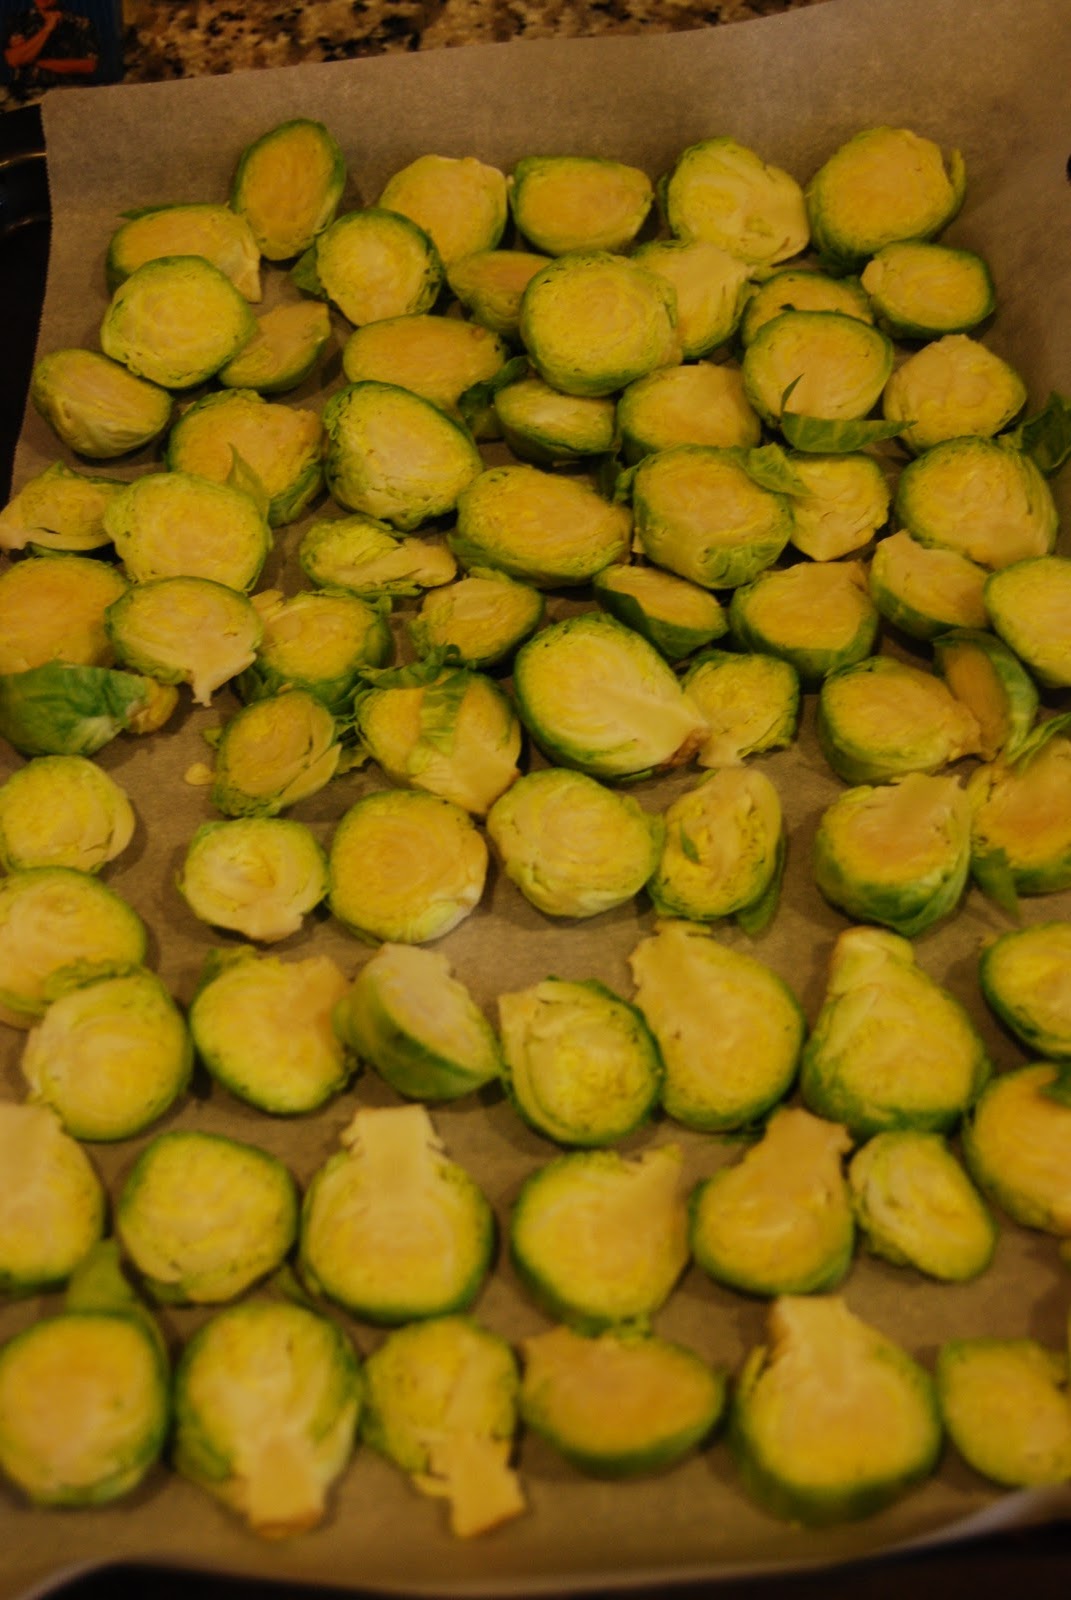
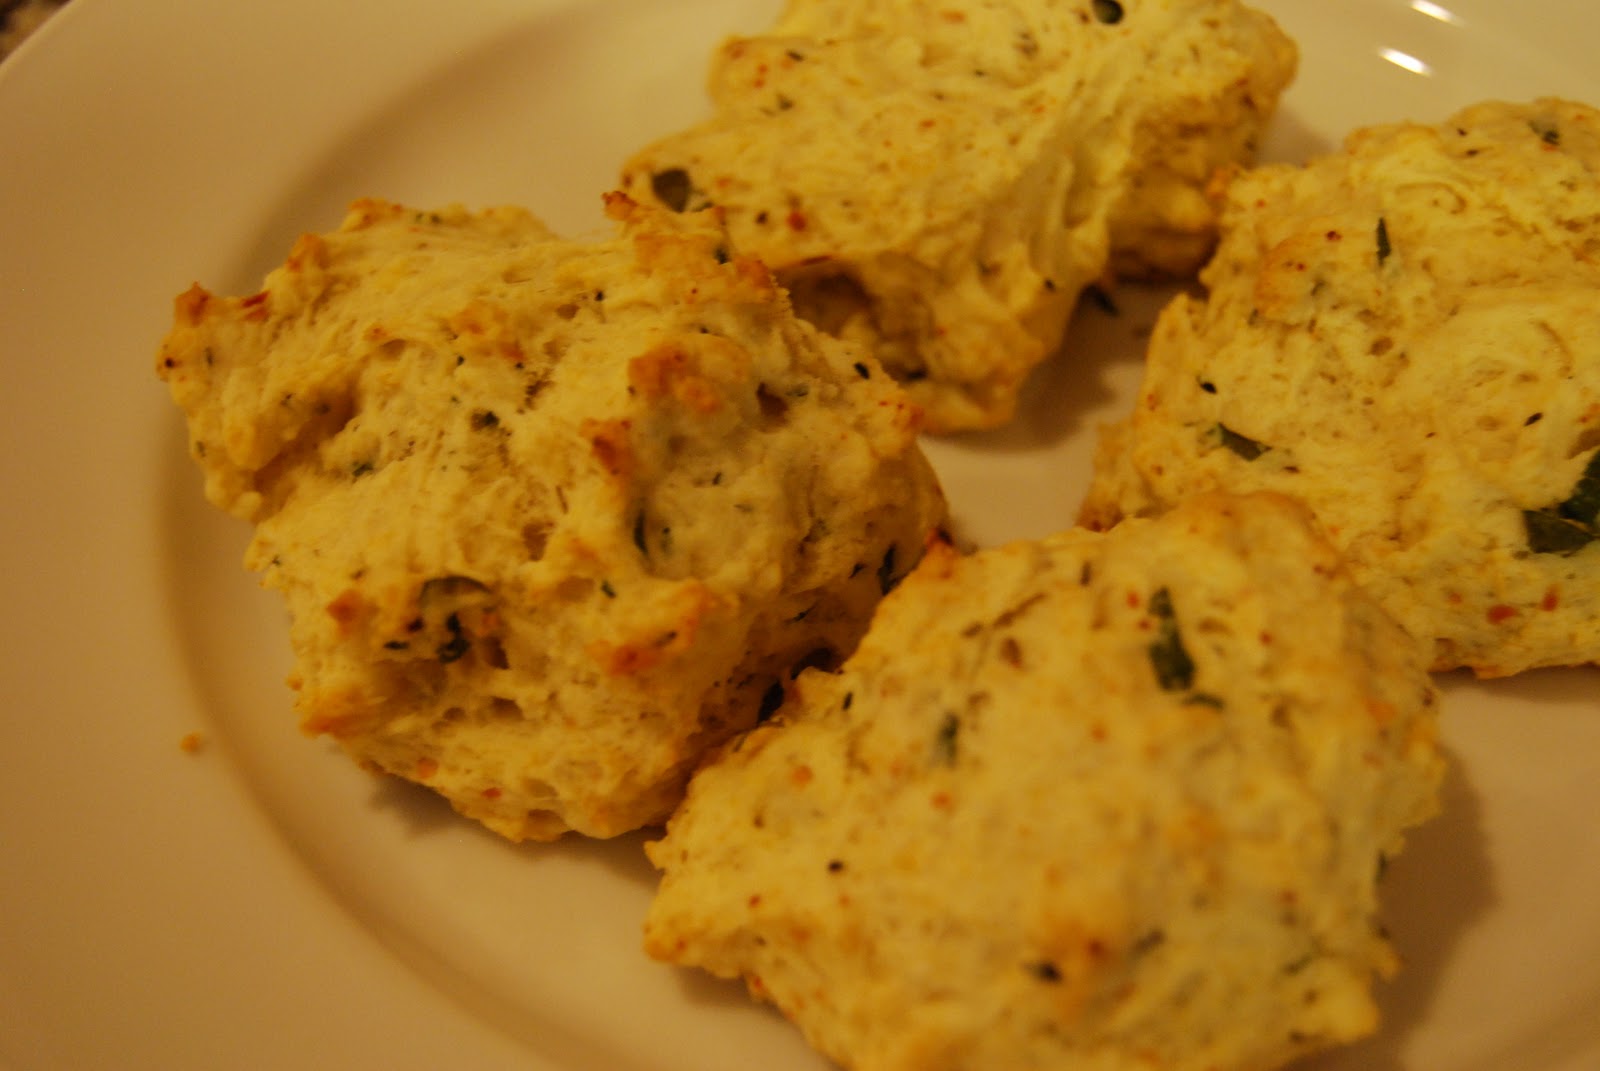
With all of your sprouts laid out on a piece of parchment paper on a cookie sheet, give them a gentle drizzle of olive oil and a sprinkle of salt and pepper.  Bake in oven at 350 degrees for 40 minutes.  Check after 30, I like mine a little browner, if you’re wanting gold then 30 minutes should be just right.

Here is some extra flavor magic: sprinkle on fresh grated parmigiana, or some truffle salt, or perhaps both.  Delicious!

Basic Brisket, and so good!


When you want an authentically Jewish brisket recipe, (not barbecue brisket, or pulled brisket, just you the familiar brisket found on Hanukkah, Passover, and Rosh Hashanah tables),  you’ll probably need to call a mom, or grandma or aunt.  If you want a different variation, visit Food and Wine.

Anyway, so I found myself in Whole Foods standing in the meat refrigerator looking at some huge pieces of meat.  That is step 1 to making a brisket, the meat is huge.  Understanding that, getting over it, and knowing that it will shrink to half it’s original size is critical.

I called my cousin Amy first – she gave a list of her ingredients.  Then I called my mom, and she gave a similiar list of her ingredients.  When it came time to go, I just did everything.

 Jewish Style Brisket Ingredients, serve 8-10
3.5 – 4 lb brisket
1 onion
4 carrots, chopped
4 stalks of celery, chopped
1 packet of Lipton Onion Soup starter (crazy, I know)
1/2 can of San Marzano Pureed Tomato
1/2 cup of Apple Cider Vinegar
1/2 cup of red wine
2 tbsp of Ketchup
1 tbsp brown sugar
1/2 tbsp of butter
Salt and Pepper
Cooks for at least 3-4 hours, at 325 degrees.

In a very large non-stick pan on medium-low heat melt some butter and add the chopped onion.  Let the onion simmer and add a sprinkle of salt.  When the onion are closer to translucent than white add the brisket to the pan.


Let the brisket cook on both sides for 3 minutes.  You’re not really cooking here, you’re just browning.  Here’s the warning, brisket has a strip of fat on one side, seeing it can be a little overwhelming and gross, keep moving, don’t worry about.
After the brisket has browned on both sides place it in a large baking pan with the raw chopped vegetables and the cooked onions.   Make sure the fat part of the brisket is on the top.

 
In a medium bowl mix the ingredients, onion soup starter, tomato, wine, vinegar, ketchup and sugar. 
Then pour all over the brisket.  You may need to use some muscle to lift the brisket to get the sauce in every little spot.  Yep, just like that.  To be fair, I texted this image to my parents to get a virtual thumbs up.  You don’t have to text my parents, you don’t even have to text your parents.  This is what it should look like.
Find a roll of aluminum foil and start wrapping.  The pan needs to be completely covered and secured. Now, you can put it in the oven for 3 – 4 hours.  Walk away.  Try not to worry, definitely do not open the oven and play with the foil.   
After removing the brisket from the oven, keep it covered for an additional 30 minutes.  This will give you enough time to make a side dish or two, maybe Kasha, or potatoes?  We made kasha and bow-ties.  Seriously good.

When you unwrap the pan, you slice against the grain.  You can let it cool completely and remove the fat, or  you can go authentic, and keep the fat on.  It’s a holiday, its going to be okay.  Enjoy the sauce, the carrots will be full of a sweet and tangy flavor and the meat will be very tender.


It’s a holiday tradition, and one that is easy to be creative with.  I think when you make it for many years, like your aunt, grandma and mom, you’ll tell someone else just add some of this and some of that.  But if you need a recipe, now you’ve got it!

Happy Hanukkah!

Holiday Shopping Wrap Up: The Daily Batch Gift Guide


For the past few weeks I have been featuring my favorite gift selections for nearly everyone on your list.  Did I miss someone?  I am still taking requests!  Anyway, I am really proud to have found multiple options at large range of price points that I would be truly proud to give and receive. 


I hope these gifts provide you with inspiration for your own list.

Happy Shopping!

Light the Lights


There are almost as many common spellings for Hanukkah as there are days to celebrate it.  That can be a little tricky, but nonetheless the holiday is a fun and easy one to celebrate.  Unlike other Jewish holidays there are no food rules or restrictions of any kind – so far, so good – and when you add in some latkes (potato pancakes) and sufganyot (jelly donuts) this 8-day celebration is an oil filled party.

The centerpiece of the Hanukkah celebration is a Chanukiah, a nine candled holder, most commonly referred to as a Menorah.  They are often works of art and there is a style to match every home, and budget (I promise)!

When we got married we registered for a menorah that would be functional/cool enough to have out all year round.  I love the work from Michael Aram, and I couldn’t resist this menorah when I saw it.

Michael Aram Olive Branch Menorah
For an even more natural look, how cool is this from West Elm?  The Manzanita trend isn’t lost on me – it was a huge trend in wedding/event floral centerpieces and I love the natural element and sculptural design of this untraditional menorah.
Manzanita Candelabra at West Elm
If your style is more modern than this menorah is perfect.  It is nine separate pieces so you can change the shape and pattern.  This is like grown up Legos, but for Hanukkah.
Nine Piece Menorah by Marit Meisler at Unica
If your home is one filled with kids, and Hanukkah means lots of presents than maybe you like a menorah that is filled with color and whimsy.  This menorah, inspired by the story of Noah’s Ark is almost as much fun as opening the presents every night.
Painted Noah’s Ark Menorah at the Jewish Museum

And if tradition is your thing, and like you a menorah that is elegant and a classic piece of art, look no further than the cut crystal by Waterford.  The simplicity is stunning, and I can only imagine how when lit with nine candles it would shine to the delight of family and friends.
Waterford Crystal Judaica Menorah

If Hanukkah is your holiday, I hope it is filled with light and love – and if it’s not I hope you’ll find a friend to share a latke or donut with over the next week.  Hanukkah recipes are coming soon!

Thanksgiving Blessings


This morning I made baklava and mini pecan pies. My sister made honey glazed corn bread with a recipe borrowed from a friend.  My mom made three pumpkin pies, pecan pie, cranberry scones, and a turkey (just for leftovers). 

In the other room my husband and father are discussing business and books and music, and life.

Pretty soon we’ll all make an apple pie that we could probably all make in our sleep.

In a few hours we will go to my great Aunt J’s house and I’ll see my cousins, aunts, grandparents and celebrate all of the things we are thankful for.  But, truly we are really most thankful for each other.

This year has been a year of triumph and successes, trying and tears, new discoveries, beginnings and the continuation of the journey we call life.  That life is made more tolerable, more sweet, more enjoyable and that much more valuable when surrounded by people you love, and the people who love you.

I wish you the most peaceful of Thanksgivings, and hope you’ll have a moment to consider and celebrate all of the ways you are thankful. 

Thank you for reading and allowing me to share my journey with you.

Pumpkin Chocolate Nut Squares


This is an adaptation of a recipe my mom has been making for as long as I can remember.  Here is how the adaptation occurred.  I was waiting on my mom for the recipe, and knowing I would need butter I left a stick (1/2 cup) out on the counter to soften.

On the phone with my mom she is reading off the recipe at which time I realize I do not have the necessary two sticks of softened butter, and I was short on brown sugar…  So, this is what happened…

Mom:  The recipe has 1 cup of butter
Carly: One cup… (sigh) I don’t have a cup of butter,  I’ll use pumpkin
Mom:  No, Carly, you can just follow the recipe
Carly: Mom, I think it will be fine.  I have some pumpkin lying around – it’ll be great.

Pumpkin Chocolate Nut Squares
Ingredients
2 Cups of all-purpose flour
1/2 tsp of cinnamon
1/4 tsp of nutmeg

1 stick of butter (unsalted)
1 cup of pumpkin
1/2 cup of brown sugar
1 egg
1 1/2 tsp of vanilla

Frosting:
12 oz. of semi-sweet chocolate chips
2 tbsp butter
3 tbsp light corn syrup

With my mom on the phone and my neck cradling the phone, in one bowl mix the butter, brown sugar and pumpkin.  If you want to follow the rules, “cream” the brown sugar and butter first so that it is fully incorporated and then add the pumpkin, then the egg and the vanilla.  For the purposes of full disclosure this is not what I did, but again, really, no stress it all works out.


To this mixture add the flour and the cinnamon and nutmeg.  The dough is going to be pretty sturdy and after working it with a large spoon, you’ll find it it most effective to get in there and mix it up with your hands.

Back to mom…
Carly: What is this supposed to look like?  
Mom: Like cookie dough.
Carly:  But, not really like cookie dough, right?  Not like chocolate chip cookie dough (remember we didn’t use all of that butter).
….
Mom:  Put the mixer down and do it with your hands – you’ll get it right.

She was right!  Okay, so with this dough, press it into a buttered 13 x 9 baking dish (brownie pan/lasagna pan).  This goes into the oven at 350 degrees for 20 minutes.

While this is baking head over to the stove top with a small saucepan and a bag of chocolate chips.  Remove 3-5 chocolate chips for taste testing.  Delicious.
On a low heat begin to stir the chocolate chips, and add the butter.  If you have a silicone spatula, use it.  It is easy to use and nothing sticks to it.  When the butter and the chocolate are incorporated, add the corn syrup a tablespoon at a time.  The corn syrup gives it a glossy finish.
After the cookie bottom is out of the oven, let it cool for 10 minutes and then with that silicone spatula scoop and spread the chocolate mixture.  Here’s the thing, because you spread the dough with your fingers it might have been uneven, and you might see finger indentations.  And then, because you spread the chocolate with a funny spatula it might also be a little wavy/weird.  Not to worry.
Open the can of nuts you have lying around, or maybe the can that you made a special trip to a grocery store for and spread them all across the chocolate. The bumps and weird waves are completely covered with salty deliciousness.  Because, sometime you feel like a nut, and chocolate, and pumpkin, and cookies!!!
My mom says to refrigerate them over night, so you probably should.  I didn’t – sorry mom.
Via text at 10:59 pm
Mom: How did they turn out?
Carly: Pretty good.  Not as good as yours, but I liked it.  
Mom: Good, I am sure they will be well received.  Leave them in the fridge.
Carly: Can they be covered on the counter overnight?
Mom: It says to refrigerate, but if its cold it should be ok
Carly: The pan was still warm so I was afraid to put it in the fridge.

Next day…
Carly: The bars are getting rave reviews, as the best ever
Refrigerate or not, cut them into cute little squares and share with friends.  I am loving this for Thanksgiving, it’s a great way to use pumpkin in something that is not a pie – but just as fun, and way easier to make.  

Thanks mom!  Oh, and enjoy!  And this Thanksgiving make sure you take a minute to thank someone that’s always helping you out!

Don’t Forget the Centerpiece


When entertaining for the holidays, or really any time of the year, your table is never fully dressed without a centerpiece.  The Fall and Winter seasons provide plenty of inspiration for table decor that is special but also simple. 

I first turn to the master of all “good things”, Ms. Martha Stewart, for inspiration:

For a simple everyday table setting how sweet is table with a collection of small sized baskets with seasonal fruits?  Let the fruit double as part of your dessert and you have a two for one special.
via Martha Stewart
 In a continuation of the fruit theme, I love the stately nature of the pillar candles and baskets filled with plump berries and grapes.  The colors sing fall while not being generic or too obviously themed.
via Martha Stewart
 For a crafty decor idea there is nothing easier than this for the mantle: take candle holders/vases that you already own and wrap with pretty paper and secure with a double stick tape.  An illuminated candle inside gives this idea an ever brighter glow.
via Martha Stewart
 I love, love, love this centerpiece.  It is a true centerpiece and worthy of a special dinner or even a fall wedding.  A bundle of wheat twisted and tied with a beautiful silk ribbon compliments the warmth and heart of the season.
via Martha Stewart
Here are some more great centerpiece ideas that I could not resist:
From pottery barn, this is a simple hurricane candle holder wrapped with dried maze and tied with twine.  It probably take no more than minutes to assemble but makes a very pretty visual impact.
Via Pottery Barn

Or you can always order a vibrant, beautiful bouquet of flowers for your table and for around your home:
via FTD
via 1800Flowers
Whatever you do keep it easy, make it reflect you and your home, and make it special with a little extra sparkle.

Happy Friday and have a beautiful weekend!

Setting the Table for Family and Friends


In my immediate family there are four of us.  Pretty average, nothing anyone would consider “large”.  However, my family doesn’t do holidays with just the four of us.  Holidays with my family include everyone: all the grandparents (I am blessed to have four healthy, amazing grandparents), all of the cousins, aunts and uncles, cousins and siblings and children of all of the cousins and aunts and uncles and of course friends that feel like family.  It is not unusual to gather around the table for Passover or Rosh Hoshanah or be spread throughout the house on Thanksgiving with 40 – 50 people.


Not quite this long, but you get the idea
Let me ask you, how do you set a table for 40 – 50 people?  Most people do not own a set of China for 40-50 people, and rarely does the heaviest stock of paper plates hold up to a good Jewish brisket…  
Necessity being the mother of all invention the table would be set  communally; beautiful China would come from an Aunt here, a cousin there, a sister from nearby.  At the end of the day a beautiful table would be set in creams and gold that was worthy of the best crowd and food.
When we got married I registered for plain, everyday white China from Pottery Barn, but now that we have moved and I have more storage in my kitchen and a proper dining room for entertaining the idea of expanding my collection is not lost on me.  Here are some entertaining must haves, for now:

Dazzle Dinnerware by Crate and Barrel

Wood-Slices Dinnerware by West Elm

Vera Wang for Wedgwood “Gilded Weave”

Growing up I would volunteer for table setting duty at my cousin Deborah’s house, and the look and feel of an extra long table, with shining glassware and matching mismatched plates has always stuck with me. The Holidays are special and are meant to be treated with extra care, a little extra sparkle and spent with the most important people.

It doesn’t even matter if you eat take out Chinese on your China, just make it special!

Instant Biscuits


Somehow this weekend I became the kind of person who makes biscuits, and my house became the kind of house that barely has a meal without one…  How did this happen?  I am not really sure, but I blame it on the suddenly seasonal weather (cold),   the abundance of soup I had on hand, and the need for something extra comforting as it became clear that the abnormally warm weather wouldn’t be lasting all fall.


Instant Biscuits, adapted from MomsRetro
1 Cup of all purpose flour
2 Tsps Baking Powder
1/2 Tsp Kosher Salt
3 TBSPs  Oil/Shortening
1/3 Cup of Water


Additional Flavors:
Fresh Basil, Oregano, Parsley, Garlic Powder, Fresh grated Parmigiana-Reggiano

Set oven to 350 degrees

Before we get started on the how, I have to get into the why.  Homemade biscuits has been on my to-do list for a while, but I never got around to it because it’s one of those things that when you want it, you want it and you don’t want to wait for proofing, and who keeps buttermilk on hand?  I certainly do not.  This recipe takes 15 minutes and is made entirely from pantry items.

In a small bowl mix all of the dry ingredients: flour, salt, baking powder. 


Add the seasoning.  I went for Italian seasoning because it paired well with the soup I had on hand, but you could just as easily use any other seasoning.  Also, this was a great opportunity to use the fresh basil that has grown really beautifully all summer, before the leaves freeze!

Pluck off 6-7 leaves of fresh basil and roll them up in your hand, with a scissor cut across the leaves to create skinny ribbons of basil, if we were fancy we might call this chiffonade, but we’re not, so we won’t.

Add the oil and the water and mix gently with a fork. 

The dough is supposed to look pretty sloppy, this isn’t a typical dough that would look nice and smooth.  The roughness of the dough leads to light and flaky biscuits.

With your fingers pull apart clumps of dough about the size of a full tablespoon and place on a cookie sheet with parchment paper.


Bake for 10 – 15 minutes.  If you can resist, let them cool enough so your can handle them.  They are very moist and won’t require butter, but that could might only make them better. 

Seriously, this is just about as easy as popping open a can of pre-made biscuits, but you won’t chip a nail, you won’t have weird flakes of paper/tin attached the dough, and they will be that much more delicious and rewarding.  Enjoy – and share with 6-8 people (because that is how many biscuits it will make, or enjoy them all by yourself!)

Roasted Potatoes, Poupourri You Can Eat


To be fair this is not so much of a “recipe” as it is a suggestion.  

I know that this weekend is dedicated to running around for last minute costumes, carving pumpkins, excessive makeup, buying candy, consuming lots more candy, and indulging on some other celebratory vices.  And that is all good.  But, the weekend is long, and eventually you’ll want something that is healthy, and easy.  This is so easy that while you’re setting your hair in curlers and finishing the details of your meat dress this can cook.

Roasted Potatoes is the most homey non-recipe recipe there is.  I like to mix a large variety of potatoes (white, red, purple, sweet, yellow) and chop them all up into chunks that are about 1/4 – 1/3 of an inch thick.

Set the oven to 400 degrees and prepare a cookie sheet with parchment paper.  And get chopping. 

Ta da!  All chopped.  When all the chopped potatoes are in a bowl drizzle on some olive oil, sprinkle on some Kosher salt, crack some black pepper.  
Okay, now here is where you have some creative license.  Are you feeling traditional?  How about some rosemary and thyme.  Want some heat?  Sprinkle on some cayenne.  Want Italian flavors?  Try oregano, parsley, and maybe some  finely grated Parmigiana-Reggiano, or do as we do and go a little crazy with the Old Bay.  There is no right or wrong amount, but you’ll want to see the flecks of flavor on each piece of potato.  This is truly an instance of “flavor to taste”.

Throw in the oven and bake for 30-40 minutes, the longer it’s in there the more browned the edges will become, again this is a personal preference.  Also, I am going to again recommend mixing up the variety of potatoes, they each have a different flavor and texture and so all together they are like a little (healthy) party in your mouth.
Enlarged to show flavor intensity detail!
Happy Halloween, this year instead of a pre-trick or treating peanut butter and jelly sandwich, or pizza (which are all more than fabulous), mix it up with this!